
There comes a time on every boat when you have no choice but to give her a little TLC. Sometimes it’s a cracked gel coat or one of the many things that broke on your last passage or maybe it’s just a little wood work that needs refinishing. In our case I’ve been putting off refinishing the counter top in the galley for far too long.
The galley gets used a lot on board and over the years has really started to show its wear. The varnish has long been gone from some areas exposing the laminate and even the plywood beneath. Since the countertop often gets wet from food cleanup and dishes we had some wear spots that were damaged deep into the plywood.
This level of damage meant we had a few options to repair it. We could tear out the whole thing and lay down some new plywood and new laminate, we could fill the damaged spots with some epoxy and just refinish the existing laminate, or we could use a different material as a countertop.
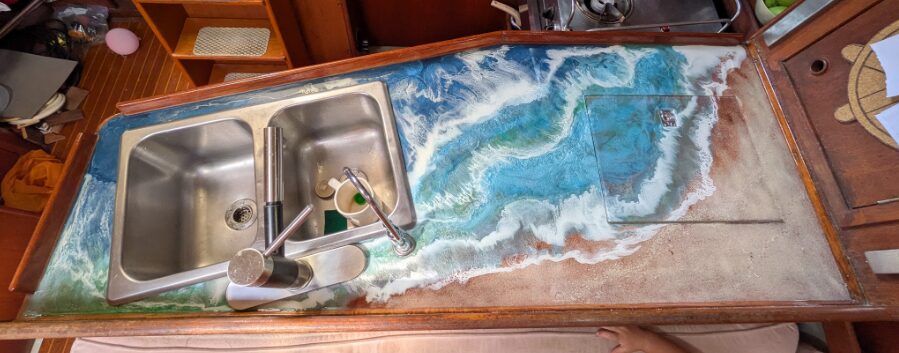
We decided to try something a little unconventional and artistic. I’ve always loved the look of epoxy artwork, especially the beach wave art that I’ve seen online. So we picked up some tabletop epoxy, some coloring pigment and got to work.
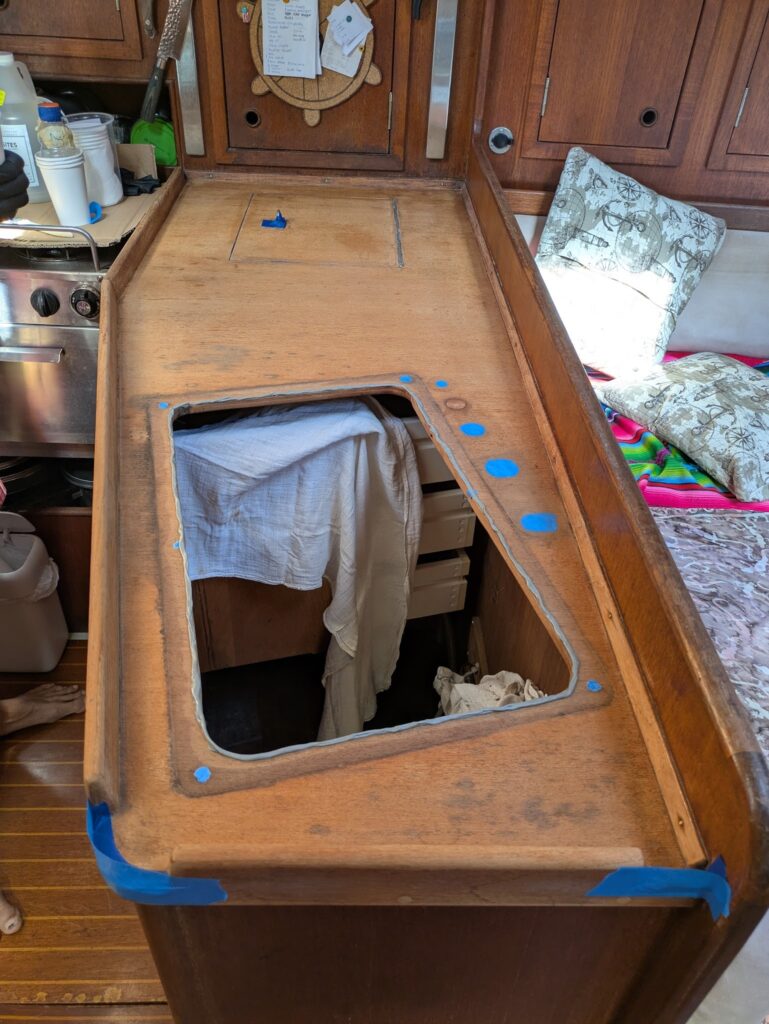
First we had to prep the surface and get rid of all the old varnish that was left. An orbital sander with 120 grit sandpaper made short work of it. Of course I needed to remove the sink and faucets as well and make sure to clean up and dust with a solvent and prep any areas where the epoxy would flow off the edge by damming it up with painters tape or butyl tape.
Since I had never worked with tabletop epoxy before and had no idea if the mika powder pigments would work the way I wanted. I did a small test run on some plywood. After mixing up the epoxy resin with the hardener I added in a little powdered mika at a time to get the color and opacity I was looking for. After some trial and error I learned what powders to use and how much I needed.
It was time to do the big project but first I had to get the surface somewhat level since the epoxy is self leveling. Being on anchor made this a little challenging. Using jugs of water on deck I balanced out the boat the best I could and started to mix up some epoxy. The first coat isn’t very thick as you just need to cover the surface making sure the wood is fully saturated. This coat gives a good bond to the following coats as well as give you a sticky surface to sprinkle sand and small shells in the areas you want the beach to go. This step is optional as you could just leave the wood bare in those spots but the sand gives it a nice look.
Before that coat completely sets it’s time to mix up more resin and add your pigments. If you used sand for the beach make sure to pour some clear resin to seal in the sand. Mix up a little at a time so you can get a feel for how much you are going to need.
I like using darker blue for the deeper water and a lighter blue for the shallower water with some turquoise mixed in. Don’t worry too much about getting it perfect as you can always add more epoxy in areas you don’t like. After you have it covered you want to blend the colors together a little where they meet. Dragging one color into the other a little. I found a glove and my fingers worked well. After you have the look you want you can use a heat gun to remove any air bubbles from the surface.
After your first layer is on you can add some more epoxy wherever you like to create some more depth. Just make sure to add less pigment to the layers on top so you can see what is underneath. When you are happy with your water and before the resin has had time to cure it’s time to add the waves. I like to add one wave in the darker section and another along the beach line. This part can be tricky to get right as the resin needs to be mixed early so that it is a little thicker otherwise it is going to spread out too much. You want to mix up some clear resin and white to be poured where you want your waves to go. The clear resin goes on first and gives the white resin something to slide on when making the waves. This also adds lacing (the bubbly look of a broken wave). Then add your white directly on top of the clear. Now comes the fun part where everything starts to look like a beach scene. Using a heat gun you heat and blow the white and clear resin around to create the wave effect. This part takes some practice and can be hard to get it to do what you want. Don’t stay in one spot too long or the resin will start to smoke but the resin needs some heat to move it around. If you don’t like the way it looks you can lay down more color and try again with the clear and white.
Let it cure before adding a final clear coat of resin to seal all the colors in and protect your work from scratches. If your resin cures too much you may need to lightly sand before adding more resin but if it is still tacky it’s the perfect time to add more without any prep. If you can get away with a final pour over the whole project then you might be done and it will have a nice glossy finish to it. If you are like me and have to fix some areas you may need to bring back the shine by wet sanding up to 2000grit and buffing to get it clear again. Then drill your faucet holes and reinstall the sink.
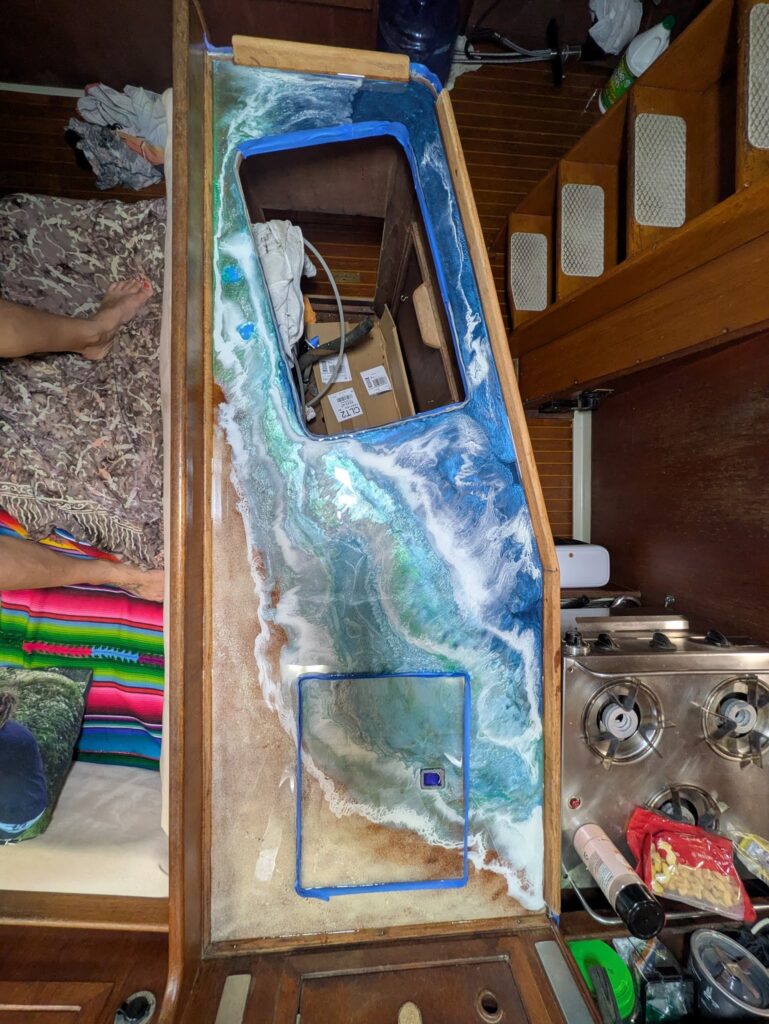
Overall I am very happy with our new countertop and really enjoyed doing this project. The hardest challenge for my counter was making sure the storage lid only partially cured before cutting it out with a razor so that I had a seamless beach scene across the whole counter.
Cory Bertrand
Cory and Alex share their adventure with weekly videos on their YouTube channel “Wildly Intrepid Sailing”. Their dream is to travel the world and to live without any regrets.